
With a plan, a set of forstner bits, drill press, band-saw, belt sander, and files I set out to craft my light housing. As I mentioned before, the housing would be made from a PC Northbridge heat-sink (top, right), and about 2" x 2" x 3.5" piece of aluminum (whats remains, top, left).
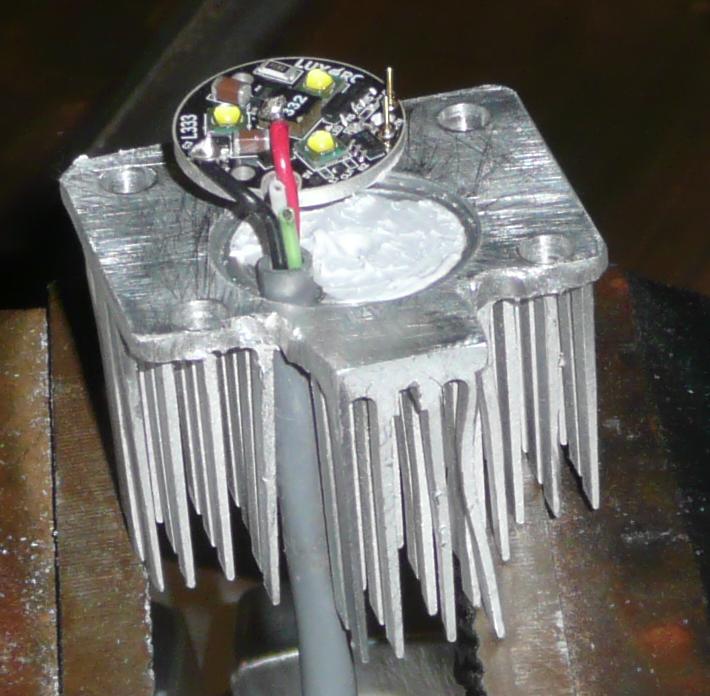
I'll call the 2 primary pieces of the housing: the mount, and the heat-sink. The PCB (printed circuit board), with LEDs and driver circuitry, lens, and o-ring are sandwiched between the mount and the heat-sink - with the mount in front of the light, and the heat-sink to the rear. I don't use any glue or fasteners to hold the PCB to either the heat-sink or mount. The heat-sink is fastened to the mount, with 4 screws, and the PCB, lens, and o-ring are compressed between.
A shallow recess is bored into the heat-sink to locate the PCB and lens with a 7/8" (22.2 mm) forstner bit.
The mount is bored from the rear using the same 7/8" (22.2 mm) forstner bit.

It would have been nice to have a little tighter bore - 20-21mm (25/32"-13/16"), because the PCB & lens can shift around a little while trying to get things centered and the screws tight. Home Depot didn't have a great selection, so it's a little roomy.
Before assembly, heat-sink thermal grease is applied between the PCB (which is on an aluminum substrate) and heat-sink, and also between the heat-sink and mount. Note that care has been taken to make the mating surfaces between the heat-sink and mount as flat as possible (carefully filed) to maximize heat conduction.
The first time I put it together without any thermal grease between the heat-sink and mount, and it felt a little warm after riding. With thermal grease between, it was cold after riding. I'll do a stationary test, and see what the surface temp gets up to, but it may be that I could make the whole thing a bit smaller (less heat-sink area) without any thermal issues.


No comments:
Post a Comment