My Rides

Wednesday, March 23, 2011

Barry-Roubaix: Getting Ready

Well, the race is here this weekend.  I've been going out for training rides in Hines Park, and in the neighborhood.  The goal in Hines Park has been to "hammer down" and ride 2 hours, burn at least 3000 calories, and simulate the race effort, exhaustion, etc.  Two down, one to go (tomorrow). 

The neighborhood rides have been to get a reality check on my pace on muddy dirt roads (there are a few nearby).  I'll go on a short ride with the skinny (700cx37mm Continental Travel Contact), and then change to my wheel with a (29x2.1) Kenda Small Block 8 and re-ride the same road.  Definitely planning to ride the fat tire, as the weather degrades, and the rain continues to fall (looks like highs of 32 for the race).
Continental Travel Contact Reflex Urban Bicycle Tire with DuraSkin (700x37)
Continental Travel Contact (700c x 37mm - my commute / trainer tyre)

Kenda Small Block 8 XC Mountain Bike Tire (DTC, Folding, 29x2.1)
Kenda Tomac Small Block 8 (29" x 2.1" - my hard-pack off-road tire)
 
The (first) bib shorts I ordered were way too big, and I definitely will appreciate the few seconds shaved without adjusting shorts.  Their replacements arrived today, and fit as perfect as such a thing can on fat folks.  (I've already been making muscles in the mirror, and admiring my shoulder to knee spandex look.)
Definitely experiencing the nerves.  Have to adjust or tighten something on the bike every night, and stress about whether my seat-post is going to slip, and if I should just put in my non-setback aluminum one (yes, I put this stuff on, but still slips 10-20 mm in 30 min - went back to the OE seat collar, cleaned everything, so we'll see tomorrow). 
Finish Line Fiber Grip Carbon Fiber Bicycle Assembly Gel, 1.75-Ounce Tube 
I check and double check that my "grab bag" has all the stuff in it that it should:
  1. Helmet
  2. Hat (under helmet)
  3. Gloves
  4. Water Bottles (2)
  5. Gatorade Bottles (3x1/2 gallon jugs with which to fill water bottles, and drink from)
  6. Arm Warmers
  7. Leg Warmers
  8. Shoes
  9. Toe Covers
  10. Spare Seatpost
  11. Tools
  12. Hockey Tape
  13. Shock Pump
  14. Big 'ol pump
  15. Tubes
  16. GU Roctane (yes trying the best of breed stuff - this is a race, and homey don't run no NASCAR pit, this is a F1 pit, YO)
  17. Maps to the race, to the hotel...

Tuesday, March 15, 2011

Brooks B17 - Adding Laces


More in this series:

In my last post I mentioned that I'll be lacing the Brooks saddle.  Again, the reason is avoid some of the flexing in the middle of the saddle, and to encourage more break-in toward the rear.  Tonight, after a spin around the neighborhood (no padded shorts), I got out the drill (sorry cringing leather workers - please comment and recommend better methods if you read this), a small combination square, and a pen.

After feeling how & where the saddle was flexing, I:

  1. Marked out symmetrical points about 7mm in from the lower edge of the saddle.  
    • The forward point is on a line perpendicular to the lower edge of the saddle, intersecting the corner radius in the frame surrounding the Brooks logo.
    • The rearward point is on a line perpendicular to the top of the word "BROOKS", offset 3mm rearward from the rearward edge of the frame surrounding the Brooks logo.
  2. Lightly scribed an arc, offset 7mm from the lower edge of the saddle between the first & last point each side.
  3. I chose points, for each lace hole, about 13mm apart on the arc I lightly scribed.  
  4. I took my smallest bit (1/16) and drilled a small pilot hole at each point (be careful drilling, not to scratch up the rails) 
  5. I chose a bit slightly larger than the laces I had (3/16) and opened up each hole, and tested that the laces fit.
  6. With a pair of needle nose pliers, in the closed position, I used the tip to burnish (probably not the right word) each side of each hole (kind of twisted the plier nose around the hole to smooth it out).
  7. I applied Obenauf's to my hands and pulled the leather laces through, to get a coating on them.
  8. Laced the saddle, like a shoe, starting at the front - I think having the knot in the back will make for quickest / easiest adjustments on the road / trail.

With a quick sit, I didn't feel much of a difference - which is a good thing.  It may be a little firmer, but, of course that's what you'd expect.  I'll update when I've been for a ride.  Here's a couple of pictures.

Update (3/16/11):  

Rode 17 miles tonight on Hines Drive.  The laces are great.  The saddle felt a little firm, so I backed out 1 turn of tension.  It could probably be loosened a little more, but I'll give it another ride before deciding.

More in this series:

Update June 2013:

A couple of years later.  The original saddle on my mountain bike has thousands of miles on it.  I've tightened the bolt a little, as the leather has broken in.  This saddle is noticeably more comfortable than those on my utility and road bikes (with only hundreds of miles).
I saw a picture online somewhere with only a single lace in the saddle.  As I thought about how the lace affects tension, and looked at my own saddles, I realized this makes sense.  For the B17 Special on my road bike, I added a single lace (a pair of holes on each side).  Works well, feels similar to the others, and makes less clutter under the seat.  


Monday, March 14, 2011

Brooks B17 - Second 100 Miles


More in this series:

I'm at about mile 80 of the second hundred miles.  I received and applied Obenauf's LP after the last post.
Obenauf's LP Boot Preservative (8 oz)
I remember a few tricks from the good ol' days of breaking in baseball gloves, and right on the jar of Obenauf's was one of my favorites (well not precisely).  The jar mentioned a hair dryer, and somewhere I read to leave the saddle in the sun to warm.  My oven has a warming drawer, and the lowest setting is about 130 F.  I put the saddle, and the Obenauf's in there for about 10 minutes to get nice and warm throughout.

Then I sat down with a towel on my lap and rubbed a generous amount into the underside of the saddle, and the "end grain" perimeter.  I pushed it into all the cracks around the metal hardware.  Then I put the saddle back in the oven for a few minutes to get it to "flow" into the cracks near the hardware.  Then I repeated the whole process (2 applications).  I think rubbed in a thin amount on the top side.

The bottom turned from it's original honey to a deep brown.
Before

After
The saddle has a waxy feel to the bottom of the saddle. I should mention that the Obenauf's smells great...  Originally, the rough, raw leather on the underside really concerned me.  I was worried a little road spray would really hurt my beautiful saddle.  With the Obanauf's applied, I really feel it's protected.

In my first 10 miles (after application), around the neighborhood, I could almost feel it breaking in.  Unlike the trainer, I was going over a few bumps and pot-holes, so I think this helped accelerate things.  I gave the tightening bolt 1 whole turn.  On my last 20 mile ride (E.N. Hines Drive) I really started to feel a "saddle" shape to it, and could feel it flexing over bumps.  I could feel the sides splaying out and rubbing my legs a little, and I could feel the rear frame on bumps.  By the end of this ride, I had tightened the saddle another whole turn (I'm up to 3 turns total).

I bought some leather laces, and I think I'll do the lacing trick (not my saddle below - see the laces just under the Brooks brand):
Brooks laces the "pre-aged" model of this saddle, and the Imperial (with perineal cutout).  I read that a lot of people lace their saddle - either to increase stiffness, or prevent chafing.  The way the saddle feels, I figure lacing will add some stiffness forward of my sit bones, allowing more of a "pocket" to develop toward the rear, with less of a "saddle" in the middle.  This will probably make it feel stiffer, so I expect I may end up backing out a turn.

Finally, with more miles, and with the Obenauf's treatment the saddle is really turning into a beautiful piece of leather.  Really makes me want to build a lugged steel frame bike.

More in this series:

(Pre)Spring Riding - Clothing


I've taken the training outside for the next couple of weeks leading up to the race.  I feel like I better get some experience riding in cold, wet weather, on cold, wet, muddy roads.  I think I commuted a couple of times in March in 2009, but that was last-decade (and more importantly, optional and only 5 miles, on the sidewalk)!  My goal is to sort out the following:
  • Clothing for extended cold rides.
  • Tires for muddy, sandy gravel roads
  • Tweaks to the bike
Installment 1:  Clothing

Wind / Rain Jacket:
I have a Marmot rain jacket that's a few years old, but it's a pretty "roomy" jacket.  It has pit vents, but the configuration of the pockets really make it catch a lot of head-wind.  It always ends dripping wet inside - that happens when fat guys wear spandex...  I hunted around for something cycling specific, reasonably priced, and in my size, and found this (that's not me, just the pic from the jacket site - nice bike though):

Ordered this one for $79.  Zip off sleeves, vented back, big pocket in back (to stuff sleeves, gloves, snacks, small road-kill in).   Sarah Palin would be proud!

Shorts:
I have a couple pairs of cycling shorts, and for casual rides, commuting, or riding on the trainer they're fine.  After a while they need a little adjusting.  In a focused ride, where I'm trying to compete that's not optimal - I'm trying to run a F1 operation not NASCAR.  Making adjustments on the bike means, at a minimum, sitting up, slowing down, and taking the hands off the bars.  So I've ordered a set of bibs from Aerotech Designs (http://www.aerotechdesigns.com/bibshort.htm#1058156) - these will also be awesome to wear while gardening (don't worry, no pics of me or other guys in spandex only). 


Arm / Leg Warmers:
I've been using a set of Novara arm-warmers and leg-warmers from REI.  I love the leg warmers - I can add them to whichever pair of shorts I like best, and they keep my legs toasty.  The arm warmers are tight on my massive biceps (and tend to slip down).  Both are a spandex / lycra type material (thinner than bike shorts) on the outside to block wind, and resist water, with a thin fleece-like material on the inside.  I initially thought I'd feel hot & sweaty after a while, but they're perfect at keeping me warm, but dry.  So, I love the material, but a whole shirt made from that would be better, at least until it's a little warmer...  So, I ordered a "fitted" Under Armor ColdGear (R) shirt made out of a similar material. 
Boys' ColdGear® Mock Tops by Under Armour 
Shoe Covers:
Also learned that my feet are freezing on a ride more than 30 minutes.  I haven't settled yet on toe covers, or some "over-sock" for my shoes.  I really like the  stuff from Sock Guy (http://sockguy.com/), so when I make up my mind that's what I'll get - I highly recommend their cycling socks by the way.  REI sometimes carries them. 


Hat / Gloves:
I have a Marmot Polartec (R) hat that is perfect for keeping the head and ears warm and dry (these may have been discontinued - can't find a pic).  I find myself taking it off after 30 minutes, but I still don't think I'd start a ride without it.  The gloves I use are Giro Blaze cold weather gloves.  
Giro Blaze Cold-Weather Cycling Gloves, Black, Small 
I tried on a number of pairs (at REI) and these seemed the most flexible and best fitting.  They've got terry patches by the thumb for wiping sweat or snot (which the more I use them, the more I love this aspect), the palms are a thin suede leather, and the back a spandex / lycra. 

Saturday, March 12, 2011

S.U.B. (Sport Utility Bike)

Read about the progress:
I just bought a used cyclocross frame on ebay to build into my "Sport Utility Bike."

Last summer I had my Cannondale 29er all rigged up with my rear rack, for commuting, and the skewer mount thing to attach the kids' trailer to.  The few times I went out on the trail I always got a few looks for my grocery-getter looking bike.  More bothersome was the rack rattling around on a trail, and loosening of my rear hub bearings.  Somehow, after towing the trailer, my rear hub bearings would be loose.  The Shimano M756 hub doesn't have a pair of locking nuts on one side (one nut buried in free-wheel, the other outboard so you can't have a wrench on both, ever), so it's tricky to get tight - the trailer must have just served to gradually loosen it.

Originally I was thinking about getting one of those fat-tire, laid back cruiser bikes.  As I got into my training, however, I could start to see myself doing a few group road rides - something neither that the Cannondale (even with some of my skinny 700c tires), nor a cruiser would excel at.  I don't expect to turn into a time-trial rider anytime soon, and this bike will also get used for commuting, and hauling the kids, so I wanted a "rugged" road bike.  Cyclocross (riding road-ish bikes in the mud, in the winter) bikes fit this bill.  It's tough, has clearance for wider (still skinny) tires, and commonly used to build "all-arounder" bikes.

I'm going to go for a look like this:
...wrapped bullhorn bars, bar end shifters (I'll be doing geared, rather than SS), and short-lever MTB brake levers.  I'll probably use my old saddle I've been whining about until I can get another Brooks.  The frame I got is a little "competitive" looking, which doesn't go with the vibe, so I may ask a friend (Tobias or his friend Rodd) to paint it some pastel color.  I had my heart set on a Surly Cross-Check in Robins Egg Blue (http://surlybikes.com/bikes/cross_check_complete/), but after bidding on a few Surly frames, and evaluating my budget, I just settled for a decent frame under $200.
I'll be updating as I build it up...

Tuesday, March 8, 2011

Brooks B17 - First 100 miles

I've put about 100 miles on the saddle so far.  Unlike some, I won't say that it's like there's no seat at all.  I still feel a little sore late in the ride, but nothing like the plastic saddle.  It's more of a dull, even sore - one that I think is getting better with break-in.

When I reach down with the plastic saddle to feel where I'm contacting it, I feel the edged of the plastic, and I feel the rails (which connect through elastomer things) right below my sit bones. 

After 60 minutes it's annoying, and after 120 minutes it's painful and fatiguing.  A few times, if I stayed hunched over the bars, I'd feel a bit numb & cold in the perineal region, and really feel the relief when I stand for a second.

With the Brooks, I can reach under the saddle, and feel bumps just forward & inboard of the metal frame in the rear (it only happens when I sit on it though, hmmm).  You can see in the picture, that just inboard & forward of the Brooks metal frame is right where the elastomer things are on the SQLab saddle.  I seem to feel some sit-bone pressure right away, however after 60 minutes I have to remind myself to evaluate how it feels.  After 90 minutes (haven't done a 120 minute ride, yet), it's about the same as after 60 minutes.  So far, I haven't felt cold or numb...  If it only gets better with break-in, then I'll be very happy.  

When I installed it, I took a good look at the departing saddle, and installed it similarly level (front to rear), and quickly found myself sliding off the front.  It now looks visibly tilted back, but the feeling is good - again, no numbness, so however it stretches & bends it seems to work.

I also had to tighten (lengthen, stretch the leather) the adjusting bolt a about 1 turn (so far) - when I would sit up I could feel the metal frame.  Feeling underneath I could feel that the leather was in firm contact with the front edge of the frame (where seated it would contact only the top).  About 1 turn of the adjustment (while riding) lifted me just so.  I put a 2nd turn into it, and it felt a little firmer, and then backed it off.  Not because it was less comfortable - this might be the right setting in the long run, but I want to apply leather conditioner before any further fuss or adjustment.  My instinct tells me that a little tighter will encourage the saddle to break-in more locally to the sit-bones, and develop less of a "saddle" shape (which could contribute to perineal pressure). 

Speaking of leather conditioners.  I had Brooks Proofide in my shopping cart, but then started consulting my favorite resources for bicycle information.  Rivendell sells Obenauf's Saddle Goop (http://www.rivbike.com/products/show/obenauf-s-saddle-goop/31-344), and they say they prefer it to Proofide.  Something that's developed for fire-fighter's boots, and is used on horse and motorcycle saddles sounds good to me.  It should be arriving before my next ride, so I'll let you know how that impacts the next 100 miles.  I also ordered the Aardvark saddle cover (http://www.rivbike.com/products/show/waterproof-aardvark-saddle-cover/11-080) to keep it dry on wet rides.

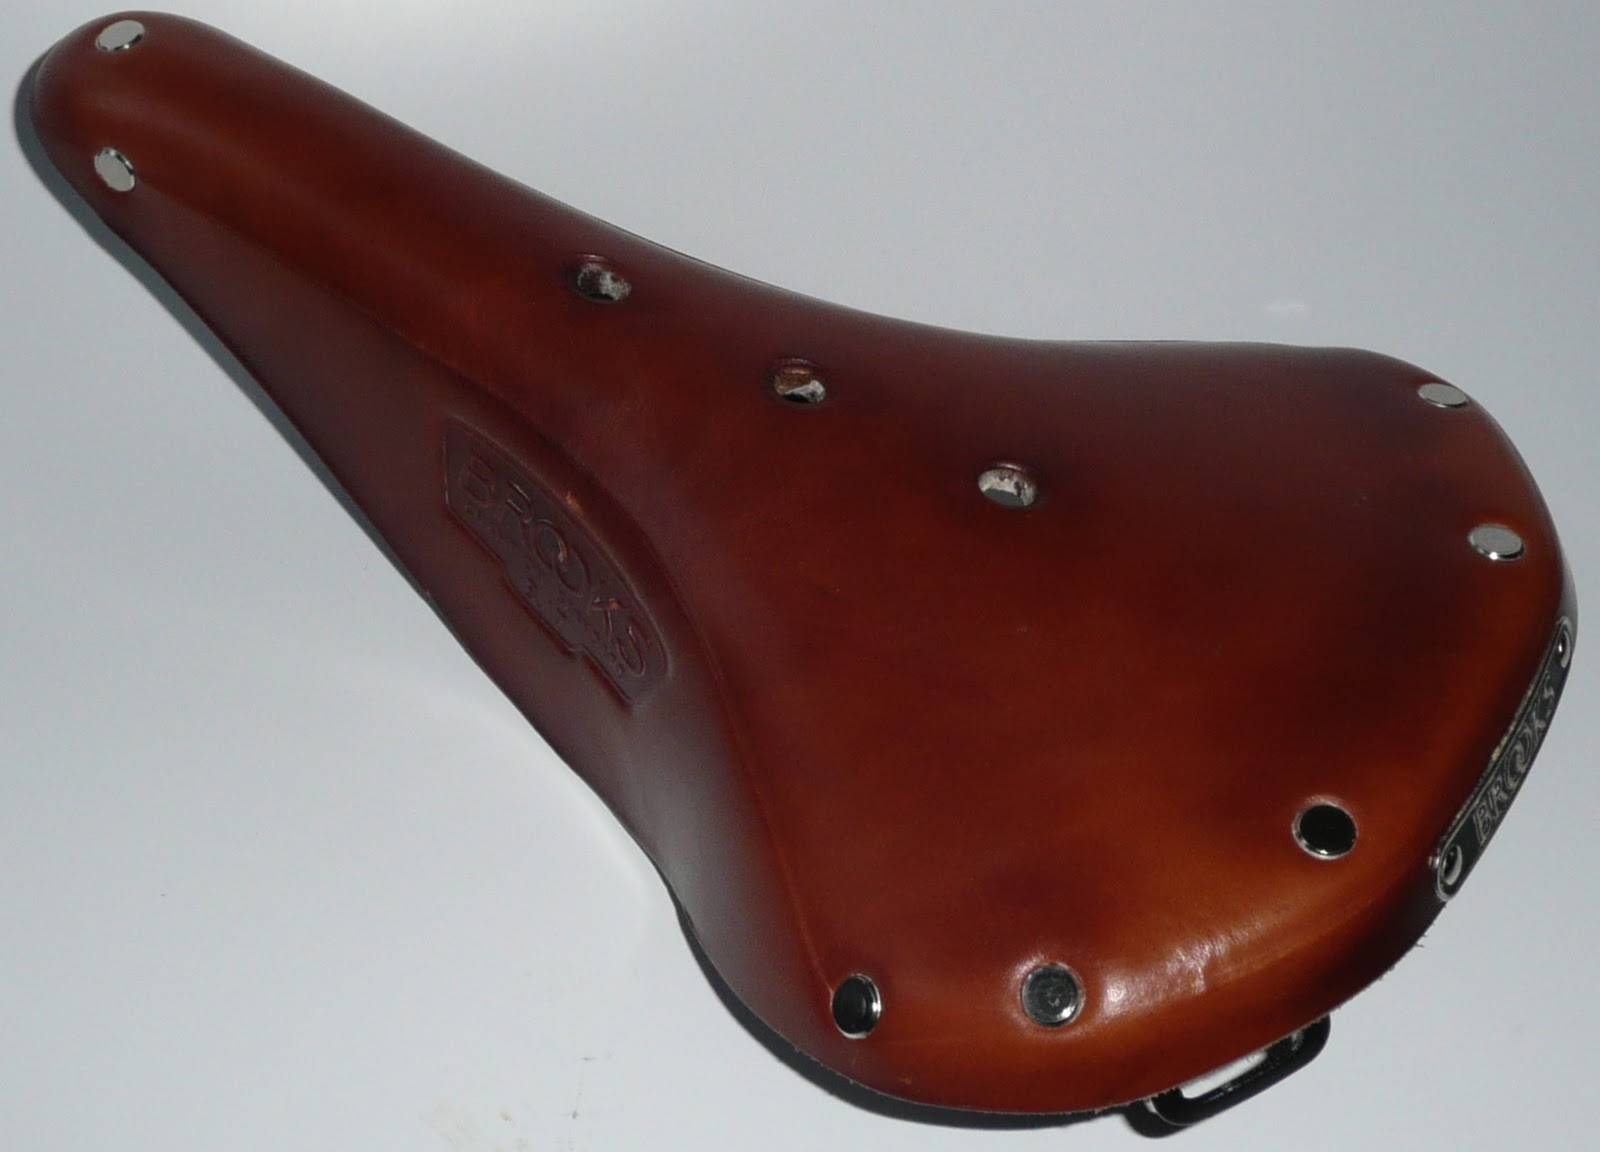
Finally, a top view, just to show how pretty the Brooks is.  In real life the color looks a bit lighter, and more homogeneous - you know what they say:  the internet adds 10 awesome.
More in this series:

Wednesday, March 2, 2011

Barry-Roubaix 2011

Signed up for the Barry-Roubaix "Killer Gravel Road Race" today.
I'm in week 12 of my training program, and will try to stretch it out until the race to keep the fitness/endurance I (hope that I) developed this winter.  The cold I've had since Christmas is finally past, and I'm feeling good on the bike.  The new Brooks saddle is helping with that (I'll write a review & post some pics comparing saddles, and illustrating the look on the bike, etc.).

There are three race lengths, 65 mile, 35 mile, and 23 mile.  I think I could have placed ahead of last on the 35 mile, but this will be my first race, and I figure small steps is a good idea.  I'll be new to riding in a group, and probably burn a lot of nervous energy waiting for the race to start, etc.

I will be accepting sponsorship for the race.  I'm looking for a complete Surly Crosscheck (Robins Egg Blue, 58cm), so if you got one of those I can have, I'll be happy to advertise.